Oct 28, 2010

Fall Banner

I am LOVING fall right now!

I was totally in denial about summer ending, but sometime in the past week or two, I got really excited that it's fall!  It's probably the changing of the leaves and the chill in the air.

I've been wanting to make a banner for a while now.  They are such a fun way to add a little color and fun to your holiday/seasonal decor!

I was going to make one in the spring, but I never got around to it.

But I did finally make one - a "FALL" banner!


I cut the letters out on my Cricut.  I love that thing!  
It made making this banner SO easy.

Oh, and I cut the rectangles out on my Cricut, too!

I decided to round the edges with a corner cutter-thing {um, apparently I don't know what they are called!}

And I used eyelets to string the twine through - two on each rectangle in the corners.


I don't actually have a lot of places in my house to hang my banner {we live in an apartment - my husband is still in school} so I decided to hang it on this mirror we have in our "entry way" {do apartments really have entry ways?}

I inked the edges of both the letters and the rectangles {it was my first time "inking" and you can tell!  I used a regular sized ink pad 'cuz that was all I had :) } and I used foam strips to raise the letters.  It gave it a little more dimension.

And I decided to add a little ribbon in between the letters to give it a little more pizzaz!


Here it is with my Halloween decor!

What do you think?

I really like it :)

The best part about it was that I had EVERYTHING on hand, so it didn't cost me a dime!  (Okay, in reality it did because I bought all of these things at one point in time, but you know what I mean . . .)
Oct 24, 2010

Peanut Buttery Brownies

If you know me well, you know that I heart peanut butter

I mean I really, really love it.

And, of course, I have a child allergic to it.  So I have to get my PB fix at night after she goes to bed.

'Cuz I really can't live without it!


So today I bring you an easy but delicious recipe - my Peanut Buttery Brownies!

 Don't they look good?!


Here's the recipe:


What you need:

- Brownie mix (any brand will do, just use your favorite)
- Baking chocolate or chocolate chips
- Peanut butter
- Butter
- Powdered sugar


I started off by making the brownies according to the package.  I happened to have a Kroger brownie mix on hand (I have to have a brownie mix on hand at all times because my husband loves brownies!  Sometimes I make them from scratch, but most of the time I use a mix).  

I wanted to add a little something extra and saw that I had a bar of Ghirardelli baking chocolate on hand.  Perfect!  
{Or you could use chocolate chips - one to two cups.  The more you use, the more chocolatey it will be!}


I chopped the baking chocolate into small squares {I used the whole bar} and added them to my brownie mix before I put the brownie mix into my 9x13 pan.  Bake the brownies according to package.
To make the peanut butter layer, mix:
1 cup peanut butter
2 Tbsp butter
2 cups powdered sugar
4 Tbsp milk
Cream the peanut butter and butter.  Add the powdered sugar and milk.  If the mixture seems too stiff, don't be afraid to add a little more milk, a tablespoon at a time.  I put in about 3 tablespoons milk and should have put just a little more, which is why for the recipe I put 4 tablespoons.  You don't want it runny, but you want it soft enough to spread on the brownies - just a little thicker than frosting would be.

After the brownies are cooked and cooled, add the peanut butter mixture.  Just spread it all over the brownies.


Cut 'em up and eat 'em!
But, make sure you have a tall glass of milk to go along with your brownies 'cuz these babies are rich!  And oh so delicious!


I'm linking up with:


Oct 22, 2010

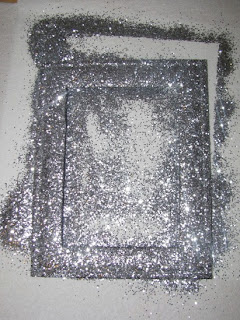
Glitter Frame


I love me some holiday decorating.  And I love sparkly things.  So I decided to combine the two!

I found THIS adorable free printable on Craftily Ever After and knew I had to use it in my Halloween decorating!


Here's part of my Halloween display:


Here's another looksy:


Here's what I did:

Supplies:

- 5x7 picture frame (you could do an 8x10 frame and do a matte w/ some fun Halloween paper)
- 5x7 printout of the free printable
- Mod Podge & brush
- Glitter (in color of your choice)
- Clear spray paint


1) I downloaded the printable to Walmart.com and picked it up the next day at the 1-Hour counter at my local Walmart.

2) I bought a $3.00 frame from Walmart.  I got one that was solid wood.


3) I removed the glass and Mod Podged the entire frame w/ a foam brush.


4)  Next, I sprinkled glitter all over the entire frame.  Do it RIGHT after you put the Mod Podge on, before it dries.  We want the glitter to stick to the Mod Podge so it will stick to the frame! (When you're done with this step, you can put all the loose glitter back into your glitter container!)


5)  I wanted to try something new . . . I decided to spray a clear finish on top of the glitter, in hopes that it would help the glitter to stay on better.  I used Krylon Crystal Clear Gloss.


And there you go!  That's how to get a fun, sparkly picture frame!  

I actually wanted to do it in black but I couldn't find black glitter.  I live in a small town and the only places I have to get craft supplies are Walmart and Joann's (I know, I'm totally deprived!).  Neither had black glitter!  It's okay, though, I think it turned out GREAT with the silver glitter!


I am linking up with:

Join us Saturdays at tatertotsandjello.com for the weekend wrap up party!

Oct 20, 2010

Dollar Store Magnet Board

Hey everyone!  And welcome!  I'm so excited to be starting Loving Every Second

For my first post I wanted to share a super fun, super thrifty project!  You may have seen this on my personal blog, but I wanted to re-post it for the new blog.

For my niece's birthday, I wanted to make her something that she would use and love.  My husband is in school full-time and we have two kids.  In other words, we are not rollin' in the dough.  A few months ago, I found some trays at the Dollar Tree that I thought would be perfect to spray paint and put in my three-year-old's play kitchen.  I rolled off of that idea and decided to make my niece a magnet board.


What do you think?  Super cute, huh?  


Well, it's your lucky day because I made a tutorial!
And here it is:

Supplies needed:

- Dollar store tray
- Primer (optional)
- Spray paint
- Mod Podge
- Scrapbook paper
- Glass rocks
- Magnets
- Easel

1)  This is what the tray looks like (you can find it in the bridal section):


2)  I primed it first - just the outer section.  When I spray painted the first one (the play tray I did for my daughter) the paint didn't go on so well, so I decided to prime it this time (it could have been a faulty spray valve, but I didn't want to take the chance!):


3)  While the primer was drying, I chose my scrapbook paper.  Then I picked a paint color that coordinated (I have lots of different colors of spray paint on hand).  I wanted a contrasting color, so I picked the blue that is in some of the flowers on the paper.  And I spray painted away!


4)  When the paint was totally dry, I cut the paper to fit inside the tray.  Then mod podged it on:


5)  Time for the magnets!  I got the glass rocks at the Dollar Tree, too, on the craft isle:


6)  I used the same scrapbook paper that I used for the tray to make the magnets, so don't throw your scraps away!  You just cut the paper slightly smaller than the rock, then hot glue it on.  (I wanted to put the letters of her name on the magnets so I had some rub-on letters that I used):


7)  Then glue the magnet on!


8)  Put the magnets on the mod podged tray and you have yourself a fun magnet board!


9)  Now all you need is an easel!  If you're giving it away as a gift, add some ribbon or tulle, a little note or picture and you are done!

Want to see the finished product again?  Okay!


I hope you enjoyed the tutorial and that I inspired you to make your own! 

It was seriously so easy and super inexpensive.  And the best part?  My niece loved it!  After she opened it, we went right into her room to find a place for it - her request!


This project cost me a total of $2.00 (I bought the tray and the glass rocks - I had everything else on hand).


You know what else would be fun?  If you used chalkboard paint instead of scrapbook paper on the inside.  Then you would have yourself your own dollar store chalkboard!  Hmmm, I bet my three -(almost four!)year-old would LOVE that!


Craft away, my friends.  Craft away.
Related Posts Plugin for WordPress, Blogger...