Jan 31, 2011

Swap Followings Linky Party #2!

It's time for another Swap Followings party over at Homemaker On a Dime!
I LOVE this linky party!

And I've already made some new friends :)

Some of my new favorite blogs are J and J Home and Peas and Crayons - go check them out!

And definitely check out the Party and link yourself up!


Creamy Butternut Squash Soup


I love making soup in the winter.
There's just something about eating soup when it's cold outside.

So today's recipe is:

{Butternut Squash Soup}

Ingredients:
2 butternut squash
1 medium yellow onion
1-2 cloves minced garlic
5 T butter
5 T flour
32 oz chicken stock
4 cups whipping cream (can substitute w/ milk)
1 tsp salt
Pinch of nutmeg (optional)

Start by peeling the squash w/ a vegetable peeler.  Then cut the squash in half, scoop out the seeds w/ a spoon and dice the squash:

Now you are going to steam or boil the squash until it is soft (I steamed mine).  While you are steaming/boiling the squash, dice the onion.  Pour some olive oil in a hot skillet (1 to 2 Tbsp) and add the onions.  Make sure you salt and pepper the onion - it will add so much flavor!  While you are cooking the onion, add the minced garlic.

Once the onion is soft (it will be a little translucent), put squash and onion together in a blender with some chicken stock.  Blend until smooth:

Now it's time to make your roux.  Melt butter in your big soup pot.  Add the flour and cook for a few minutes to cook the raw flour flavor out:

Now you will slowly add the chicken stock, continually stirring as you do it.  It should thicken up as it heats up.  Once it starts thickening up, pour in your cream/milk and continue stirring.  

Next it is time to add your butternut squash.  Just pour it in with the milk mixture and stir.  At this point, I let it heat up and then add my salt.  Start with less, maybe 1/2 tsp.  You can always add more, but you can't take it out once it's in.


Now, I like to add just a pinch of nutmeg, maybe 1/4 tsp, to the pot-o-soup.  Try a little!  It adds a little something special (I learned this tip from Rachel Ray).  And if you like it, you can add a little more :)  In fact, I garnish mine with just a little:


 This soup is mm, mm good!
Try it on a cold day - you won't be disappointed!

PS - Jen from Tatertots & Jello featured my {Love} Birds Valentine craft!  Yippety Skippety!


Linking up w/:


Jan 29, 2011

The Blog Guidebook

A lot of my readers are people like me
who are trying to get their blogs up and running
and trying to get new readers!

Welcome to The Blog Guidebook.

They have a wonderful website with lots of
fabulous blogging tips!

Plus, you can list your blog there for FREE!

So head on over and check them out!


Jan 27, 2011

{Featured!}


Yay!

Tasha over at Creation Corner featured my Valentine's {Love} wreath!
Click HERE to see the feature.


And guess what?
My wreath was featured over at I Heart Naptime, too!
Click HERE to see the feature.


It makes me feel all warm and fuzzy inside when people like my projects :)


PS - Does anyone else feel like today (Thursday) is Friday?  I'm all sorts of confused today 'cuz I keep thinking it's the weekend!

Jan 25, 2011

{Love Birds}


Have you ever noticed that for five months,
we are all on a sugar high?  From October to February, we have holiday after holiday, which means yummy food and yummy treats.
Which also means that we are likely to gain a few pounds.

And I admit that I did this holiday season. 
It was only three pounds, but it's three more pounds than I want!
I've lost two and I'm in the process of losing that last pound.  Hopefully by next week it will be gone!

How am I doing it?
I'm counting calories {I've cut out unnecessary snacks and replaced them with fruits and veggies} and cutting out sugar.  Not totally cutting it out {I'm one of those that can't feel deprived or else I relapse :) }, but I'm trying to be a lot more conscious about what I put in my body.


Enough of my ramblings.
On with the crafts!
I found these cute birds on my Storybook Cricut cartridge and thought they would be perfect for a fun Valentine project!

I also used the Storybook Cricut cartridge for the "LOVE" font.
I used the Plantin Schoolbook cartridge for the "birds" font.
And I glued them on my birdcage paper with a glue stick.

I love myself a little bling, 
so I couldn't resist adding some to this project :)

To give it a little more dimension,
I raised the birds with those sticky foam strips (hmm, not sure what they're called).
I also inked the edges of the birds and the heart w/ my ink pad.


And this project was free since I had everything on hand!
That's the kind of project I really like :)


What kinds of things do you do to decorate for Valentine's Day?

Jan 23, 2011

Swap Followings Linky Party!

Homemaker on a Dime has SUCH a great idea!

Joining a Linky party that gets you more followers - not just hoping it gets you more followers!

I try not to focus on how many followers I have.
I feel like it all goes back to the popularity contest in HS.
And I don't want to worry about how many followers I have.
I just want to have fun blogging.
But I do care, darn it!

So this Linky party helps you get more followers and
In return, you agree to follow at least two new blogs.
A little bit of the I scratch your back, you scratch mine idea.

{LOVE} it!

So head on over to Homemaker on a Dime and check it out!


Jan 21, 2011

Valentine's {Love} Wreath


I finally got my Valentine's wreath done!
It's been a work-in-progress all week.
Why, you ask?
Cuz I've been taking care of my sick children who, by-the-way, are still not better!
So sad :(
I'm starting to get cabin fever.  For real.
Anywho . . .


I wanted to do a yarn wreath because they are so. darn. cute.


I bought a straw wreath at the thrift store a few months ago and kept it for future use, so I pulled it out for this project.
 {That's right - I got it for one dollar!}

I kept the plastic wrapping on the wreath - I thought it would be pretty messy if I took it off.


Then I started wrapping the yarn.  I started by wrapping it around once and tying a knot, like so:


Then I kept cutting long lengths of yarn and wrapping/tying:


I'm not gonna lie, it took FOREVER to wrap the whole wreath!
And it wasn't totally perfect, but I knew I was putting some embellishments on it so it didn't bother me.


For the embellishments, I cut out a heart on some cardstock using my cricut.  Then I traced it onto some burlap:


I cut out the burlap, then, using spray glue, glued the burlap onto the cardstock:


I have a bag full of lace scraps and decided to put those to use.  I hot-glued some lace on the outside of the burlap heart:
{I originally had two hearts of different sizes.  This is the one I didn't use.  Just in case you were wondering why it has different lace than the one I used :) }


It needed a little something more so I decided to back-stitch something onto it.  I used the burlap as my guide and back-stitched "Love" with a little heart.  I love how it turned out!


Using some more lace scraps, I made some lace flowers.
I just held the lace on one end and rolled it up:


Then I hot-glued the end to the roll:


Next I hot-glued a piece of felt on the bottom to keep it from unraveling:


Then I glued my flowers onto my wreath, along with the heart:


So freakin' cute, huh?!


I wanted to hang it by ribbon on my door but couldn't figure out how to do it.  My husband suggested we staple it to the top of the door.  I knew I kept him around for something :)


I really love how this wreath turned out.
It's got a fun vintage feel to it.


Plus, the wreath cost me a total of about $3.00!
I had everything on-hand except for the yarn.

Oh how I love being thrifty :)

Jan 19, 2011

Framed {Be Mine} Printable


I framed my {be mine} printable!

Remember the Glitter Frame I posted about back in October?
That's what I framed it in!


I think it looks super cute, all sparkly and fun :)


What are you framing yours in?  
I'd love to see!
Email me at LovingEverySecondBlog@gmail.com

Jan 18, 2011

So, I had all these plans for crafting and blogging this week.

Well, those plans went out the window - I've been playing mommy 
{actually I play mommy everyday to my two girls, but I've been playing mommy to my sick four-year-old.  And the poor girls has been really sick}.

So here's to hoping she gets better soon so that life can resume again!

But I do have to admit, it was nice staying in my jammies all day yesterday and cuddling with my sweet girl :)

Jan 12, 2011

A new must-read book!


Okay, guys, this is SERIOUS business!

I love reading and I love finding out about new books that I need to read.

I read Matched by Ally Condie over the Christmas holiday and it is AWESOME!


If you liked The Hunger Games trilogy, then you will {LOVE} this book!

Not only is it a great story, but Ally Condie is a fabulous and very talented writer.  She sucks you right in and paints a beautiful picture for you with her wonderful words and story-telling.  I was really sad when the book was over and kept thinking about the story and the characters.  A lot.  That's when I know the author RoCkS!

So for real, you need to read this book.

Plus, I was on the author's blog and found out she's from the town I live in!
How rad is that?  
That's right.  I said rad.

Do you guys have any must-reads I need to know about?
Comment on and tell me about them!

Free {Be Mine} Printable!

I'm finally getting started on my Valentine's Day decor!
I feel like I'm behind on the game - I've already seen some amazing Valentine's projects out there in blogland!

To kick off my Valentine's posts,
I'm giving you guys a free printable!


It's simple, but that's what I love about it.

If you want to download it, right-click and then save it to your computer.  Then become a follower of Loving Every Second!
{You might need to click on it first to make it bigger, then save it to get the best quality download . . .}

I haven't printed mine off yet, 
but it will be best as a 4x6 or 5x7.

I will be back soon with some fun Valentine's Day projects and tutorials!

Jan 9, 2011

{Chocolate Peanut Butter Cupcakes}


Oh.  My.  Yummy.

I needed to make some treats for some people.
I like to make treats that I would like to receive.
So I decided to make cupcakes.

But not just any cupcakes.

{Chocolate Peanut Butter Cupcakes}!

Peanut Butter, oh how I love you!
And mixed with chocolate?  
How can you go wrong?


 Here's the recipe:
{Chocolate Peanut Butter Cupcakes}

1 box chocolate cake mix
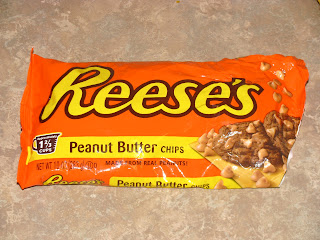
1 package Reese's Peanut Butter Chips


I started with my chocolate cake mix (I bought what was on sale) 
and these:
 Which, by the way, are delicious in and of themselves.

I made the cake mix according to directions, but I added about 1/3 c applesauce (I used the snack cups that my kids eat) to help keep the cupcakes nice and moist.

Then I added the chips:

 I spooned them into my cupcake wrappers in my muffin tins and baked according to the directions on the cake mix (the cake mix I used said to fill the cups 1/2 full but I filled mine about 3/4 full.  I like my cupcakes BIG!).


While the cupcakes were cooling, I made the peanut butter frosting.
This, my friends, is what makes these cupcakes oh. so. yummy.


Peanut Butter Frosting

2 Tbsp butter
2/3 c peanut butter (heaping)
5 c powdered sugar
6 to 7 Tbsp milk

I usually just make up my frosting recipes, so when I made this one, I made it up, too.  I started with 1/3 c peanut butter, added 1 Tbsp butter, added some powdered sugar and then a little milk.  It did NOT make enough frosting!  So I doubled this recipe for you so you can cover all of your cupcakes.  

I know, I know.  You're welcome :)

I creamed the butter and the peanut butter:
 {remember, you want your peanut butter heaping}

Next I added the powdered sugar.  Mix until well blended. 

It will be really thick at this point.  Add your milk a little at a time until you get your desired consistency.  You can use a little more or a little less than the recipe says.  Play around with it until you get your desired consistency.  I wanted mine pretty thick, at least a little thicker than I usually make frosting.  I actually had half and half on hand so I used that to make my frosting extra creamy.

Blend a little longer than you think is necessary.  I think this helps the frosting become extra smooth, but it's not scientifically proven to do so :)

Next, get a plastic sandwich bag and spoon the frosting in (I forgot to take pics, dang it!).  Fill it up and zip it closed.  Snip the corner with some scissors:
{Note:  snip the corner AFTER you fill the bag with frosting!  Since I forgot to take pics while I was actually doing it, I took a pic after for your viewing pleasure}

Starting on the outer top of the cupcake, squeeze your bag and swirl it around the cupcake until you have covered the whole cupcake.
 
I promise you, this is easier than just using a knife and spreading it on.  Plus it's so much prettier!  It makes the cupcakes feel fancy :)

How fun would it be to add a sprinkling of mini chocolate chips on top?

And that, my friends, is how you can make yourself a chocolatey, peanut-buttery treat.  Mmm, mmm good!
Jan 6, 2011

Frame Solutions


A few months ago, I took my friend's family pictures.
I hadn't gotten around to editing all of them (we took them right before the holidays - that's my excuse!) and this week my friend's birthday rolled around.

I thought, perfect!  I can edit, print and frame one of the pics for her birthday present!

I get almost all of my frames at the thrift store.
You can get high-quality frames that are solid wood for SO CHEAP!
And most of them just need a little coat of paint to look great.

So I found a frame (it was a pinkish/peachy color) and spray painted it.
It was FREEZING outside when I painted it.  Needless to say, the paint wasn't drying right.  But you know what?  I like how it turned out!  It looks like I distressed it, and I didn't have to do any of the distressing myself - score!  You can see it in the pics below.

Here's a pic to show the "before" color - I forgot to take a pic of the frame and the beautiful pic that was in it before :)  But here's a pic of the mat.  It matched the frame almost exactly:

I bought a white mat at the store.  When I put the mat and picture together in the frame, the frame was too big!  It was supposed to be an 11x14, but it was more like a 12x14.  There was an extra 1/2 inch on either side of the mat that you could see through the glass.
 {It's kind of hard to see in the pic above . . .}

{but you can totally see it here}

I was ready to go buy a new frame.  Then I thought there had to be something I could do so that I could use that frame!

I opened my ribbon cabinet and saw the perfect ribbon to line the mat with!
So I cut the ribbon to fit down the mat:

I wrapped the ends around the mat and hot glued it:

And here's what it looked like:

After putting it in the frame, I thought it turned out great!  It added a little bit of style to the picture.  
Here's a close-up:

And the whole frame again:

It solved my problem and made the picture even better!

When you're in a crafting dilemma, use your creativity to solve your problem!  I saved myself money by not having to buy another frame {plus the time I spent spray-painting}.

Happy crafting!
Related Posts Plugin for WordPress, Blogger...