Showing posts with label recipes. Show all posts

Dec 20, 2011

The best granola . . . ever!

So, you might think that this post will have a recipe for the best granola . . . ever.  But I'm actually on the search for the best homemade granola recipe!  I've never actually made granola (until today) but I LOVE it - it's my cereal of choice.  But it's so expensive and some of the ones at the store aren't that tasty.  Which is why I am on the search for the best homemade recipe!

I started with my first recipe today.  You can see the recipes I'm trying on my Pinterest board, On the search for the best granola recipe . . .

Today, I'm starting with this crunchy granola recipe (made with less oil, which is why I picked it), found over at Family Fun.  I'll let you know what I think!  It's in the oven baking as we speak.

I tweaked it a little, using milled flaxseed instead of wheat germ, adding some coconut, replacing the sesame seeds with sunflower seeds and using almonds and cashews for the nuts.  And since I want it a little chewy, I may only bake it for 30 minutes instead of 40.

If you have a favorite granola recipe, please share!!!  I'd love to add it to my Pinterest board.

I hope you are all having fun, baking away and spending time with your families.  I truly love this time of the year!

Nov 6, 2011

Soy Lime Fajitas


Oh boy, you guys are gonna love me for sharing this recipe with you!!!

I originally got this recipe from my cousin, April, from Sweet Ruby {check out her website, she's got super cute stuff!}.  And now we make it all the time.  Thank you, April, for introducing us to this super delicious meal!!!


And not only is this recipe super delicious, it's healthy, too.  And I love finding healthy AND delicious recipes.

SOY LIME FAJITAS
1.5 to 2 lbs chicken or skirt steak, cut into strips
1 med onion, sliced
2 large peppers, different colors, sliced
1/4 cup soy sauce
1/4 cup lime juice
1 tsp chili powder
2 Tbsp oil

Combine soy sauce, lime juice, chili powder, and oil in large bag (last time I used half the oil and it was totally fine).  Slice meat and place in bag with marinade.  Let marinate for two hours in fridge.  You can freeze it at this point if you want to do a freezer meal.


Cut up your veggies in strips and set aside.  Sometimes I'll throw in some mushrooms, too, if I have them.

Cook your meat fully and remove from pan.  Cook your veggies in the same pan until softened.  I usually salt and pepper my veggies.  Add the meat back to the pan once the veggies are softened and let it heat through.

I usually buy the raw tortillas, cook them up and serve my fajitas on them.  They are so yummy!  And while the second side is cooking on the stove, I will melt a little cheese on the tortilla.


Add your meat and veggies, a little sour cream, maybe some Cholula, and you are good to go!

This is one of our go-to meals.
You should definitely give it a try!


Thank you to Bountiful Baskets for providing me with red peppers!  I love getting red peppers in my basket - it means we will be having Soy Lime Fajitas that week :)


Thanks for stopping by!
Sorry I've been a little MIA lately - I have been so busy and blogging has not been at the top of my list.  But I've got some fun new posts planned in the near future, so don't forget to come back!

To see where I link up, check out my sidebar!

Oct 3, 2011

Cookie Cutter French Toast

French Toast is a favorite at our house for breakfast.
Seriously, why is French Toast so good?

And my kids love helping with anything in the kitchen.  Usually it's stirring the egg mixture for the French Toast {yes, I'm capitalizing the first letters in those words.  Because French Toast deserves it.  Because it's that good}.
So I thought it would be fun to let my kids cut shapes out of the bread first {who likes the crust anyways?  My kids don't!}.  And since it's fall and Halloween is right around the corner, we used our Halloween cookie cutters!

First make your egg mixture.  Here's how I make mine - it's super yummy:
Michelle's Perfect French Toast
2 eggs
Splash of milk (probably 2 Tablespoons-ish)
1/4 tsp cinnamon (I'm totally guesstimating that.  Just sprinkle it in until it looks like the amount you'd like)
Dash of nutmeg (around 1/8 tsp.  Again, guesstimating here)
1 tsp vanilla
4-6 slices of bread


Whisk all ingredients together in a shallow dish {I usually use a pie dish}.  Like I said, my kids love helping on this part.  Any kind of stirring is so exciting to them :)  Sometimes I'll add an extra egg and a little more milk if I run out of my egg mixture before I'm out of bread.  Just depends on the day and how many pieces of French Toast we want to eat.
Dip your bread in the mixture and turn so each side is submerged.  Then your bread is ready for the griddle!

But I'm getting ahead of myself.  You need to cut out your shapes first!  We had a cat, pumpkin, witch and bat.  All perfect for Halloween!  And, of course, the kids love this part, too!

Time to grill to perfection on your griddle {or fry pan, whatever you use}.


And this is the result you will get:


You can't beat that - a smiling face on a Saturday morning!

What things do you do to incorporate the holidays into your everyday routine?


Check out my sidebar to see where I link up --->

Sep 8, 2011

Cheesecake Brownies

I have another delicious recipe to share with you today!


Don't worry all you crafters, I have some projects coming up.  I just didn't have a lot of time to devote to my craftiness over the summer.  I've been busy having fun and doing summery stuff with my kiddos.  But now that school is in session, I feel my crafty bug biting at me . . . 

But today we're talking brownies.  And not just any brownies.  Cheesecake brownies.  Holy moley, were these good!

Here's how you make them.


Cheesecake Brownies

Brownies:
Your favorite brownie recipe

Cheesecake Frosting:
8 oz cream cheese, softened
2 Tbsp butter, softened
1/4 tsp almond extract
1 tsp vanilla
3-4 cups powdered sugar


For the brownie part, I used my favorite {homemade} brownie recipe.  The recipe calls for butter, but I substituted half of the butter with cream cheese.  If you are using a boxed brownie mix, don't worry about this part.

While my brownies were cooling, I made the cheesecake frosting.  The frosting is what makes these brownies!!!  Mix the cream cheese and the butter together until smooth.  Add the vanilla and almond extract.  The almond extract is what sets this apart from regular cream cheese frosting and gives it more of a cheesecake flavor - yummy!  Mix well.  Add your powdered sugar, one cup at a time, mixing before you add the next cup.  Add until you have your desired consistency.  I made my frosting pretty gooey.


Now go ahead and smooth the frosting over your brownies.  After you've snuck a taste or two.


At this point, you, of course, will taste your cheesecake brownies.  But be careful - you may or may not be able to stop at just one.  Just sayin'.


If you like cheesecake treats, you'll love these Cheesecake Brownies!!!  They went fast at my house.  I really need to make another batch, pronto!


Hope you all have a great weekend!
I'm still trying to recover from last weekend - we went to Sedona, AZ for Labor Day.  We had so much fun!  But getting back to real life is always hard after a fun vacation . . .


Wanna know where I link up?  Check out my sidebar --->

Aug 30, 2011

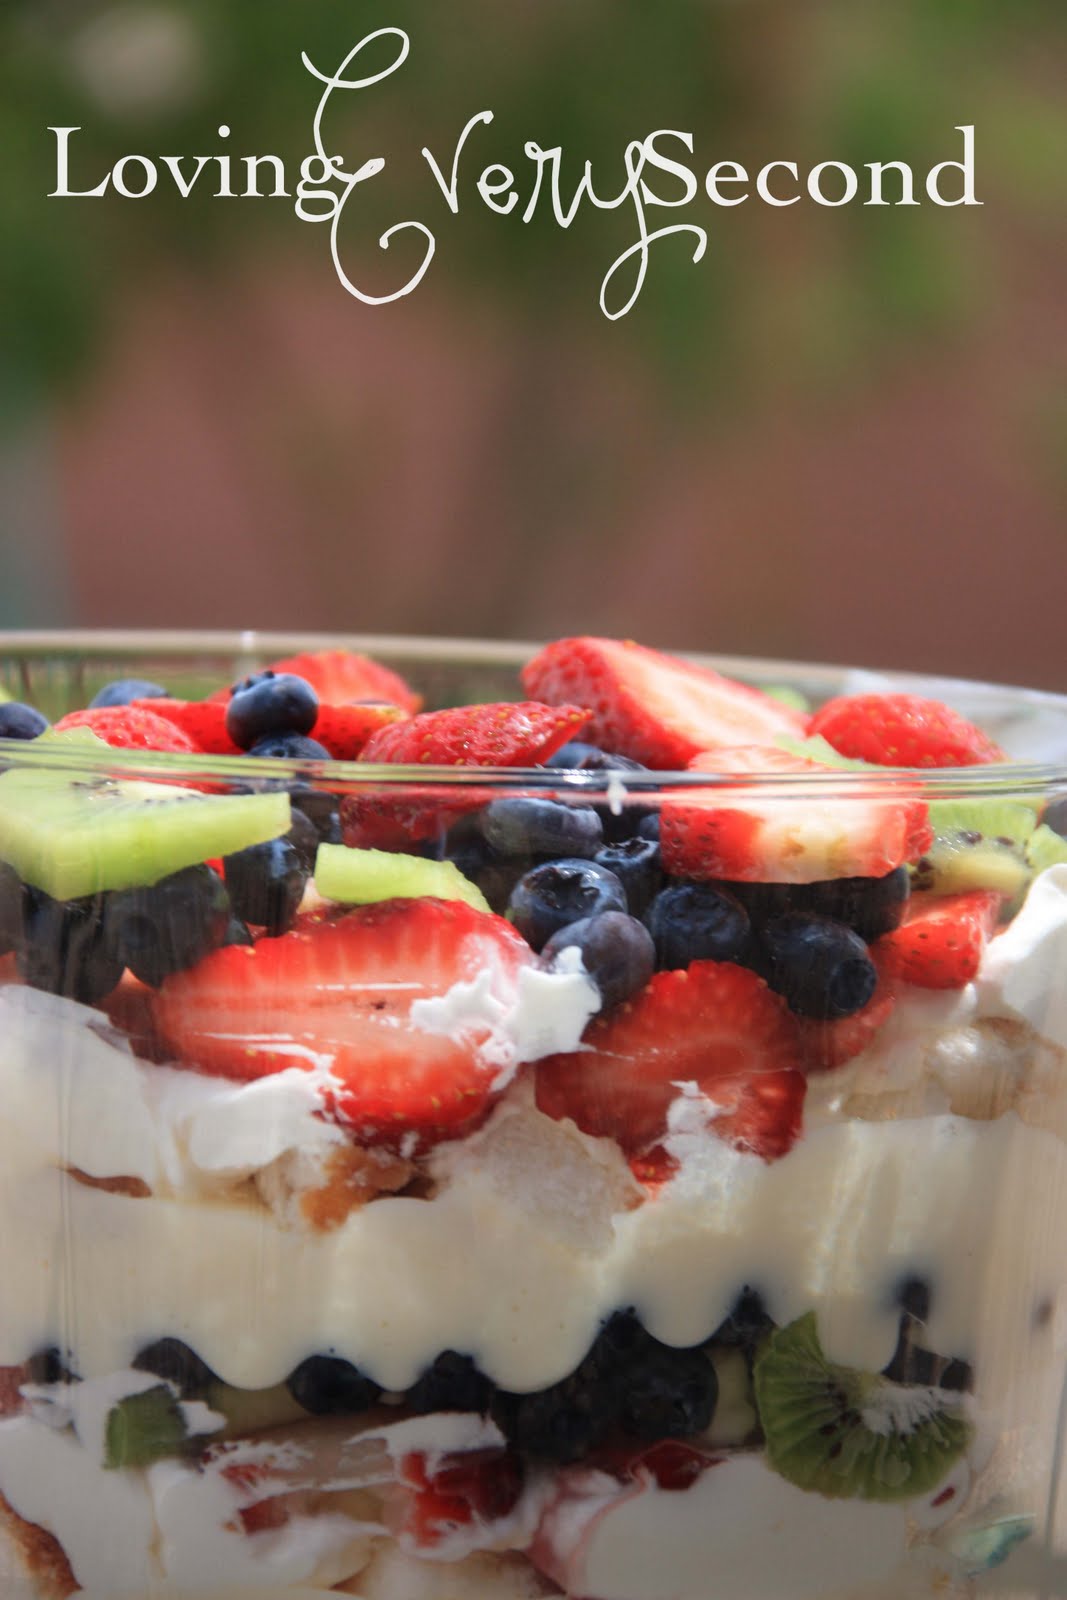
Fresh Berry Cheesecake Trifle!

 
Yes, you read that right.
I am sharing my Fresh Berry Cheesecake Trifle recipe with you today!

Who doesn't love a good trifle?
And since grilling and BBQ season is almost over, I thought I better share this recipe before it's too late.  Fall is right around the corner.  Craziness!
 
 
You can make this and take it to your next neighborhood BBQ!  Not only does it taste delish, it's pretty and colorful, too!


Here's what you'll need:

Fresh Berry Cheesecake Trifle

1 Angel's Food Cake or Sponge Cake (already made)
1 large box Jello Pudding, Cheesecake flavor
1 Pint whipping cream
1-2 tsp granulated sugar
1 pint strawberries
1 pint blueberries
3-4 kiwis

Let's start with the pudding.  Mix it according to directions on box and let it set up.  FYI - I bought the sugar-free kind, which was still super delicious but cut back on my sugar intake.

While the pudding is setting up, you can cube the cake into bite-size squares, like so:

Whip your cream and add some sugar to sweeten it up.  Start with 1 tsp and go from there.  Make it as sweet as you want!

Make sure your kiwis and strawberries are cut up into bite-sized pieces and your blueberries are rinsed.  Mix them all together in a bowl.  


You're ready to start layering!

Start with the pudding.  Put a generous amount on the bottom.  Then add a layer of the cake, a layer of whipped cream and a layer of the fruit.  Repeat until all of your supplies are depleted :)  It should fill a regular sized trifle dish.  Top off with some canned whipped cream to make it pretty if you want :)  I took some pics before the whipped cream was added to the top and some after.  Just in case you were wondering . . .


This was such a delicious, refreshing treat on a hot, summer day!  Go ahead, make it for yourself.  You won't be disappointed!


Check my sidebar to see where I link up -->

Aug 24, 2011

Peach Cobbler Cupcakes

I thought I'd share the recipe I used on my guest post last week! 

When I was asked to come up with a recipe for Cupcake Month over at Snips and Spice, a few combinations came to mind.  But I decided to go with Peach Cobbler Cupcakes.  Yummy! 


Wanna make some for yourself?  Here's what you'll need:

Cake Ingredients:
1 box yellow cake mix, prepared according to directions on box
1 tsp cinnamon
1/2 cup applesauce
1 15 oz can of sliced peaches, plus some of the syrup
Butter

Fresh Peach Frosting Ingredients:
1/3 to 1/2 cup peach puree {puree of 1 peach}
1 stick butter, softened
1 tsp vanilla
4 to 5 cups powdered sugar

Let's start with the cupcake batter.  Follow the directions on the back of your cake mix box.  The one I had called for 1 and 1/4 cups of water.  I used 1 cup of water and 1/4 cup of the syrup from the can of peaches.  Just to add a little more peachiness.  Add 1 tsp of cinnamon and 1/2 cup applesauce.  You may also want to do the "high altitude" directions on the back of the box so the cupcakes aren't too fluffy after they are baked - the applesauce can do that.  But it makes them oh so moist and delicious!

Divide your batter into your cupcake wrappers.  Cut your sliced peaches in half and add two to three pieces per cupcake, like so:

Then, add a little pat of butter to each cupcake - we are going for the real peach cobbler taste here, folks!  No messing around :)

Now you are ready to bake these bad boys!  Bake them according to your cake mix box.  Let them cool.

While they are cooling, you can make the frosting.  I took one peach and pureed it in my magic bullet.  If you don't have a nifty magic bullet, a good old blender will do the trick, too.  I didn't measure it, but it made 1/2 cup of puree.  Mix your butter and peach puree together.  Add the vanilla.  Mix well.  Time to add the powdered sugar.  The amount is going to depend on the consistency you want and how much puree your peach made.  Add a cup at a time and stir just until blended.  If you feel like you want your frosting a little thicker, add a little more (I do it 1/2 cup at a time and I like mine a little thicker).  Let me tell you, this frosting is heaven.

If you don't have an official frosting decorating bag, you can do what I do - use a sandwich baggie!  Fill the baggie half-way with frosting and then cut one of the corners.  Then you can squeeze it right onto the cupcake and make it look nice and pretty :)


These were de-lish!
I even ate one with some whipped cream on top.  Tasted just like peach cobbler!


Hope you're all having a great week!

Wanna see where I link up?  Check out my sidebar --->

Jul 28, 2011

Strawberry Coconut Cupcakes


I've got a delicious cupcake recipe for you today!

I love making homemade strawberry frosting to put on cupcakes.  I decided to combine that with coconut - two flavors that I think are delish alone.
Put them together?  Yummy!

Let's get this party started!


Strawberry Coconut Cupcakes
CAKE:
1 package white cake mix
3 egg whites
1/3 cup vegetable oil
2/3 cup applesauce
1 tsp coconut extract
1 cup coconut

FROSTING:
1 cup butter
1/4 cup strawberry puree*
1 tsp vanilla
5 cups powdered sugar


Mix all of your cake ingredients together.  Follow the instructions on the box as far as how long to mix the batter.  Then bake your cupcakes according to the box.  Let the cupcakes cool.

For the frosting, mix the butter with a hand mixer (butter should be a little chilled, but not hard).  Add the strawberry puree* and the vanilla and mix until well blended.  Add your powdered sugar.  You may want to add a little more or a little less, depending on the consistency you want your frosting to be.  I wanted mine a little thicker, so I used a little more sugar.


* To make the strawberry puree, blend about 1/2 cup of fresh or frozen (but thawed) strawberries in a blender until they are pureed.  Not too hard :)


Then you can decorate your cupcakes however you'd like!  I put a slice of strawberry and then sprinkled some coconut on mine to make them pretty.  Cuz it's more fun eating pretty cupcakes, right?! 


Now it's time for you all to get your cupcake on!!!
What fun flavors do you like to make?


PS - I had more pics, but either Blogger or my internet was being SO SLOW tonight!!!!  So I gave up after waiting for almost 2 hours to upload the last few pics . . .  Maybe I'll try again tomorrow . . .


To see where I link up, check out my sidebar! -->


Jul 14, 2011

{Homemade} Garden Veggie Spaghetti Sauce

 
Time for another recipe, my friends!
Remember my Spaghetti Squash Spaghetti recipe?  This is sort of an extension of that recipe . . .

I decided to make my own spaghetti sauce.  It's SO easy to do, and so much better for you.  I looked at the ingredients in the kind we usually buy and it has high fructose corn syrup!  In spaghetti sauce?  Is that really necessary?  Plus some other stuff that I can't pronounce, like most pre-made things you buy at the store.

I like my spaghetti sauce chunky, so I made a garden veggie spaghetti sauce and it turned out so yummy, I had to share :)


Homemade Garden Veggie Spaghetti Sauce

Ingredients:
1 yellow onion, diced
2 cloves garlic, minced or finely chopped
1 zucchini, chopped
3/4 c cup mushrooms, chopped
1 15 oz can tomato sauce
 1 6 oz can tomato paste
1 14.5 oz can diced tomatoes
1 Tbsp fresh chopped basil (or more to taste) or 1 tsp dried basil

To start out, chop all of your veggies, like so:

Add a little bit of olive oil to your saute pan, add your garlic (let that cook for a minute or so on it's own in the oil), onion, and zucchini.  Then salt & pepper all of that.  It would also be yummy with a green pepper and carrots . . .
When the onion and zucchini are just about cooked, add your mushrooms, with another light layer of salt & pepper.  

Then it's time to add your tomato sauce, tomato paste and diced tomatoes:


Stir the tomato sauce and tomato paste in with the veggies.  The paste is really thick, so just keep stirring until it is fully incorporated.  Once it's incorporated, add the diced tomatoes.  If you'd like, you can add a little sugar at this point.  I didn't add any to mine.  Just start with a teaspoon, or even a half teaspoon, and go from there, adding 1/2 to 1 tsp at a time until it is at your desired sweetness.  You will also want to salt & pepper again at this point.

Stir your basil in (I used fresh oregano, too, but not sure how much I used . . . feel free to season up your sauce!).


I then let the sauce simmer for about 30 minutes while I got the rest of the meal prepared.


I served my spaghetti  with these yummy Mozzarella stuffed Meatballs from Picky Palate.  They were really yummy!  I used turkey burger instead of ground beef.  They were moist and delicious, not dry at all, just like meatballs should be!


And, of course, top off your prepared spaghetti with a nice sprinkling of parmesan cheese!  I love eating healthy - especially when it's easy.  Making your own sauce and using spaghetti squash for your noodles is a great way to cut out preservatives and add your veggies.

ENJOY!!!

To see where I link up, look at the bottom of my sidebar -->

Apr 15, 2011

Better Than Rice Krispy Treats - Peanut Butter Style


These treats were a wonderful mistake!!!
I was making Rice Krispy Treats and decided to use a little peanut butter.  'Cuz at my house, treats are just better with a little PB.
I reached into my pantry for the Rice Krispies and they were almost gone.  What to do, what to do.
Not to worry, I had a whole box of Corn Chex.
I used those instead and, let me tell you, these treats did not disappoint!

So here's the recipe . . . I know you're dying to make some right. now.

{Better Than Rice Krispy Treats}

1 stick butter
3/4 c peanut butter {I didn't say these were healthy . . .}
1 bag marshmallows
5 or 6 cups Corn Chex
1/2 cup chocolate chips, melted

I always make my Rice Krispy Treats on the stove.  But if you do yours in the microwave, that's cool, too.  We can still be friends :)
Melt your butter and peanut butter over medium heat.  Add your marshmallows and melt those all the way, too.  No lumps, please.


Remove from heat and add your Corn Chex.  I didn't measure mine, but if you go for 5 or 6 cups, that will maybe be enough, depending on how gooey you want them.  If you want a little more, just pour a little more!  Really, these are hard to mess up.

Then, in a greased jelly roll pan, pour your mixture and press into the pan.  Mine didn't fill the whole pan, which means yours probably won't either.  That's okay.  Promise.

{TIP}:  Get your hands wet, then press it into the pan.  It totally works!  I do this with Rice Krispy Treats, too.  The marshmallowy stuff won't stick to your hands and you can press to your little heart's content.

You will now have this deliciousness:


Now you can add the melted chocolate chips.  Just melt in the microwave, stirring every 30 seconds until all the chocolate chips are melted.  Drizzle with a spoon over the entire pan of gooey goodness, er, cereal mixture. 

Just like Rice Krispy Treats, let the mixture cool before cutting.

And yummy-yum-yum, you have yourself a super delicious treat!!!
But beware, I'm pretty sure you will eat four more than one, like me.


Just thought I'd let you drool over a few more pictures.

Now what are you waiting for?
Go make some for yourself!


Here's where I'm linking up:
Related Posts Plugin for WordPress, Blogger...